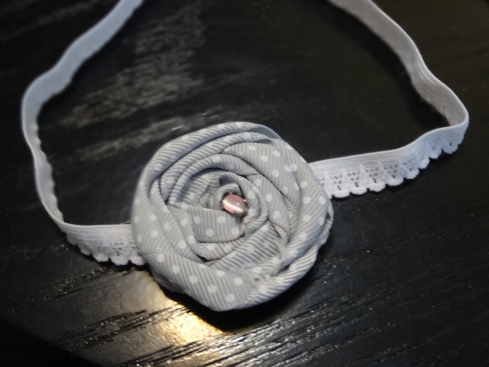
Some of the items on my baby prep to-do list includes some cute accessories to have on hand for those early newborn pictures. I decided I should try my hand at creating a cute little “I’m a girl” headband for her to wear. While unpacking and putting away some baby gifts this weekend, there were a few things that caught my eye that I figured I could re-purpose into some rosettes for a headband. I gathered them up along with some other items I had in my stash: Cute ribbon from sweetly wrapped packages, some left over fabric from projects past, and the fabric pouch that a crib sheet was packaged in.

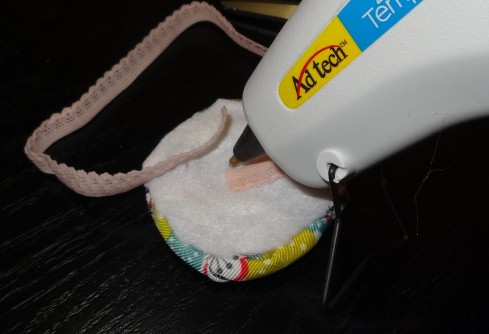
To make the rosettes, I cut the fabric into about 1 -2 inch wide strips. Next I cut out a circle from some left over felt to use as a base to the flower. I took my glue gun and added a dab of glue in the middle of the felt circle, and adhered the corner of the fabric to the center. I let it sit for about a minute for the glue to harden everything into place.

I then twisted the fabric, and started to wind it around the center, using my glue gun to glue the fabric down every inch or two as I wrapped it around and around.

Once complete, I trimmed away the felt base from the edges.

I created several different rosettes using this same method. You can see that the different materials created slightly different looks, and I also played around with how tight or loosely I twisted the fabric or ribbon.
I also hunted through my jewelry box to see if there were any old earrings or accessories that I could use for embellishing a rose or two. I came across the hair pins that I wore for my wedding, and thought it would be fun to incorporate one of them into one of the flowers. The gem was attached to the hair pin with some wires, so I simply clipped and unwound the wire to remove the gem, and then glued it into one of the rosettes.
To create the headband, I picked up some elastic at JoAnn Fabric. They were a knit texture with a sort of lace pattern that was softer than the other elastics, so I thought it would be nice and soft for a baby’s head.
I had used a tutorial I found on Pinterest to create the headband at http://thesassypepper.blogspot.ca/2011/02/headband-tutorial-and-bitsy-band.html. It referenced this headband measurement guide:
Newborn (13 1/4″)
3-6 Months (14 1/2″)
6-12 Months (16″)
12 Months-Teen (17 1/2″)
Adult (18″)
So I measured out 13-1/4″ of the elastic for a newborn size band, and glued the ends into place on the back of one of the rosettes.
The tutorial recommended a 1/4″ overlap.
Once the band was in place, I cut another circle of felt to glue a final base on the back of the flower.
I made three different versions with the rosettes I made:
After I had finished them up, I came across an orphaned earring and did one more add to the grey polka dot headband. Can’t wait to see how they look on our baby girl’s head!


